My Edible Garden

Edible Landscaping the Backyard

Sustainable Living

It's not that hard.

Wednesday, June 13, 2012

Mother Nature Drops By...


 Just last Sunday, mother nature blew through. It wasn't surprising because the weather folks were expecting some storms days ago. I was happy because our garden needed the rain. As the lightning and rain began, all seemed fine. Then a big gust of wind blew through, knocking out tons of limbs from our infamous willow tree. As I glanced out the window, I noticed a larger branch on the ground. Half of our crabapple tree was now laying on the ground. It's the second infamous tree in our front yard.

 Luckily, clean-up was fairly easy, and our county has a compost site where we can trash our limbs for free. The large branch that fell from the crabapple was indeed rotten and soft in the middle. It was on our "cut-down list," so the whole tree will be coming down eventually. But I'd rather that be on my own time instead of mother nature's.

Wednesday, May 30, 2012

Top Ten Plants That Have Changed Minnesota

Plants are probably the most important thing we have on planet earth. They've transformed how we live, rule our economy, and shape our culture. The University of Minnesota has just released a top-ten list for the plants that have changed our state.

It got me thinking on a more local level. Has a plant changed the way you live? Has the backyard apple tree turned into a pie-making tradition with family every fall?
Some of these plants can be applied to where you live, and some are unique to Minnesota. So for the good and bad, here are the top ten plants that have changed Minnesota.

Alfalfa: Only with winter hardy alfalfa could dairies be profitable in Minnesota. Wendelin Grimm, a German immigrant, selected winter survivors from his alfalfa fields and developed Grimm alfalfa in the 1860s. Today, Minnesota ranks sixth in the nation in milk cows, milk production, and total cheese and honey production. Alfalfa is a favorite of honeybees, and like all legumes, it adds nitrogen to the soil.

American elm: Though ravaged by Dutch elm disease, this beautiful shade tree, native throughout the state, still graces many streets and landscapes today. Tolerant of city conditions and the robust Minnesota climate of hot summers and cold winters, the American elm is a survivor. Genetics and breeding have given new hope for Dutch elm disease-resistant selections for urban and suburban sites. Elms support more than 200 species of Lepidoptera, or butterflies and moths.

Apples: Challenged in 1860 by Horace Greeley’s statement that “I would not live in Minnesota because you can't grow apples there!” Peter Gideon introduced the Wealthy apple in 1868. It was followed in 1922 by the Haralson, and subsequently 26 U of M introductions, including the Honeycrisp in 1991, the Zestar!® in 1996, and SweeTango® in 2009. Honeycrisp was recognized as one of the top 25 innovations of the decade in 2005 by TIME magazine. Millions of Honeycrisp trees have been planted worldwide, and in 2006,Honeycrisp became Minnesota’s state fruit.               
                                            
Corn: Valued at $7 billion annually, corn covers 7.3 million acres in Minnesota, making the state fourth in U.S. production. Yields have changed from 39 bushels/acre in 1959 to 146 bushels/acre in 2007, due to cold-hardy varieties produced especially for Minnesota. U of M introductions account for nearly 200 hybrids. In 1992, TIME magazine designated hybrid seed corn as one of the most significant events that shaped our world during the past 1,000 years. Corn has more than 3,500 uses in commercial and industrial products and manufacturing processes.

Purple loosestrife: Originally planted as an ornamental garden plant, purple loosestrife is the poster child of invasive plants. It has taught us how significantly a plant can transform the valued wetlands and waterways in Minnesota. Careful management with biological and chemical controls, along with education, and cooperative measures, learned from purple loosestrife should  help us deal with other invasive plants in the future.

Soybeans: Valued at $3 billion annually, soybeans cover 7.3 million acres in Minnesota. Originally grown as forage, the seed and oil crop was developed by researchers at the U of M. Soybeans are an excellent source of protein: Each seed is 40 percent protein, compared with 25 percent for other legumes, and 12 percent for other cereal grains. Soybeans' uses range from livestock food for poultry and Minnesota’s 49 million turkeys, to baby formula, adhesives, oil products and more. Minnesota is third in U.S. soybean production.

Turf and lawn grass: From a sea of prairie grass to a sea of green carpet, turf and lawn grasses - predominately Kentucky bluegrass - have transformed Minnesota’s landscape. Valued for recreation, erosion control, and preventing pollutant runoff from entering Minnesota’s waterways, grass cools and covers countless acres in Minnesota. Only through best  management practices can  turf benefits offset the  inputs that can harm the environment. Turfgrass contributes $8 billion to the state’s economy in retail and wholesale sales of sod, seed, and related equipment for homeowners, as well as recreational sports uses.

Wheat: Wheat was the first large monocultural grain crop in Minnesota. As early as 1879, 72,000 bushels of Minnesota wheat were exported to Spain. Wheat built Minneapolis, Minnesota’s industrial “Mill City,” which today does more than $200 billion of food and agricultural related business annually. Minnesota ranks third in U.S. spring wheat production, and 10th in overall wheat production. 

White pine: White pine forests once covered more than 3.5 million acres in Minnesota, but today cover less than 100,000.Prized for its strong, straight trunks, white pine built the cities of the Midwest and provided lumber for the ships of England as early as the 1600s. Today more than one million white pine seedlings are planted annually in Minnesota. On average, more than 30 white pine trees are planted for every tree harvested.

Wild rice: A staple food of the Ojibwe for centuries, the location of wild rice determined early human settlement in Minnesota. Minnesota today produces more than half of the world’s hand-harvested wild rice and is second in the nation in the production of cultivated wild rice. Native to lakes and wet areas, wild rice was named Minnesota’s state grain in 1977 for its cultural and economic significance.

There you have it. Has a plant changed how you live?

Monday, May 7, 2012

Welcome

Hello Everyone , welcome to my new blog focused around my garden and my love for fine cuisine. With this blog, I hope you will be inspired to get going on your own garden and try some of my recipes with your family in your own kitchens. Please share this on Facebook and Twitter...good things on the way- Food of Love , Tre.

Thursday, February 25, 2010

Spring Gardening On A Dime!


It's almost that time again to start planning your spring garden, during my research to find out what's new, what worked last year and what didn't, I came across some really helpful tips on how to save money while turning out the best garden you can. I will definatly be using some of these tips this year in some of my gardens and I encourage you to take a look at them and see if any of the tips can help you save a dime or two. Happy planning!

Grow your own from seed.
Keep seeds back from the previous season from flowers and vegetables that grew in your garden. Allow the seeds to dry (to prevent mildew over winter) and place in separate bags, well labeled. Store somewhere that is warm and dry over winter. As spring gets closer, plant the seeds in seedling trays and keep indoors near a window that gets a lot of sunshine. Water and tend to them regularly and you will get a head start on the new season's plantings.
2Strike cuttings.
If you fancy plants in someone else's garden, ask if you can take cuttings to strike your own. Many gardeners are very pleased to be asked this. Botanical gardens often have mid-winter pruning clear outs in rose gardens, etc. Phone up to ask when this happening and to see whether members of the public can get cuttings from these tidy-ups.
Once the likelihood of frost has cleared, take the seedlings outdoors and continue watering them in their trays. Do this for a week or two, to help them transition from the indoor environment to the outdoor one.
4Create a garden plan on paper.
As with a shopping list curtailing overspending in the store, a garden plan curtails purchasing of whims when you go to the garden center. Draw in the flowers, the vegetables, the ornamentals, the decorations, etc. that you'd like in your garden this year, in their exact places. This plan will guide you on buying "just enough" and no more (and don't forget to combine with the plants that you're growing yourself).
5Keep an eye on garden sales in catalogs.
When the sales are on, this is an excellent time to buy the sale items in bulk. Naturally, only buy what you will use but have an eye for a good bargain, including for updating/replacing, etc. new garden tools, hoses, netting, etc.
6Buy plants that have been reduced due to lack of adequate attention.
In some garden centers, there will be a section of plants that haven't been adequately cared for, going for a song. If you've a green thumb and you can identify the likelihood of successfully salvaging these plants back to health, these can make incredible bargains.
7Make your own garden decorations.
Rather than buying decorative items for the garden, recycle and reuse household items to create new and amazing garden sculptures, feature pieces, water elements, etc. Be as imaginative as you'd like and rope the kids in to help too. They can have great fun making a dinosaur garden with their toys, a fairy garden with their fairies, an animal garden for their pets, etc.

Wednesday, January 6, 2010

Easy Italian Meatballs

Easy Italian MeatballsIt’s the time of year when you want something comforting and hearty for dinner. That usually means meat in my house. I could make meatloaf, but I wanted something a little different. So I decided on meatballs. After all, they’re almost like mini meatloaves.

But this recipe didn’t taste like any meatloaf I’ve ever eaten. Each meatball was packed with flavor from parmesan, garlic and spices.

Easy Italian Meatballs

I wasn’t really sure how to make meatballs, but it turns out they are really easy. I just thoroughly mixed all the ingredients in a big bowl with a spoon. Then I used my hands to roll medium-sized balls and laid them on a foil-lined cookie sheet.

The smell from the oven was great, so I hoped they would taste just as good. And sure enough, they were awesome. They would be a great addition to pasta or especially a meatball sandwich.

Ingredients
  • 2 lbs ground beef
  • 1 large egg, slightly beaten
  • 1/2 cup grated parmesan cheese
  • 1/3 cup breadcrumbs (or use enough to hold the meat together)
  • 2 large cloves of garlic, minced (or use 1 teaspoon garlic powder or to taste)
  • 1 teaspoon salt 
  • 1 teaspoon fresh ground black pepper
  • 1/3 cup milk
  • 1/2 teaspoon dried oregano
  • 1/4 cup chopped fresh parsley (or 2 tablespoons dried parsley)
Directions
  1. Preheat oven to 350 degrees F. Mix all ingredients together in a large bowl.

  2. Shape into medium-sized meatballs (at this point you can place on a baking sheet and freeze to use later, or cover with plastic wrap and refrigerate up to 24 hours before using).

  3. Bake the meatballs at 350 degrees F for 25 minutes or until cooked through.

  4. Add to your favorite, simmering pot of pasta sauce.

Easy Italian Meatballs

Thursday, December 17, 2009

Soft & Chewy Gingerbread Cookies

Soft and Chew Gingerbread Cookies The holidays wouldn’t be complete without gingerbread. Of course, this would be my first attempt ever at making the traditional cookie so I didn’t know what to expect. Even though you have to roll the dough and chill it, it’s a pretty simple cookie to make.

I used the food processor method to mix all the ingredients. But unless you have a large food processor bowl, I would use a regular stand mixer. The directions are simple. Just add your dry ingredients, then a little butter and gradually add the milk and molasses. Almost instantly you’ll know you’re making gingerbread. The aroma from the ginger and molasses and the deep color of the dough is a wonderful sight.

Once the dough was mixed, I divided it and rolled it flat between two pieces of parchment paper. If you hate rolling dough, this method is pretty simple. You don’t have to worry about dough sticking to the rolling pin, or flouring your work surface.

I prepared the dough the day before I need the cookies, then chilled the sheets of rolled dough between the parchment overnight. The next morning I used my new tree cookie cutter to cut out the cookies and gently put them onto a parchment-lined baking sheet. In my gas oven, each sheet of cookies only took about 8 minutes.

The cookies taste great. Even if you’re not a fan of gingerbread you may like these. They are slightly spicy, yet mild. And the soft texture of the cookie is great. I prefer chewy and soft gingerbread rather than the gingersnap style of cookies. I’d like to keep my teeth in one piece.

For a rolled cookie recipe, this one is super simple and great for the holidays.

Printable Version
Directions

For about twenty 5-inch gingerbread people or thirty 3-inch cookies

Because flour is not added during rolling, dough scraps can be rolled and cut as many times as necessary. Don't overbake the cookies or they will be dry. Store soft gingerbread in a wide, shallow airtight container or tin with a sheet of parchment or waxed paper between each cookie layer. These cookies are best eaten within one week.

Ingredients

3 cups all-purpose flour
3/4 cup firmly packed dark brown sugar
1 tablespoon ground cinnamon
1 tablespoon ground ginger
1/2 teaspoon ground cloves
1/2 teaspoon salt
3/4 teaspoon baking soda
12 tablespoons (1 1/2 sticks) unsalted butter, cut into 12 pieces and softened slightly
3/4 cup unsulphured molasses
2 tablespoons milk

Directions

1. In food processor work bowl fitted with steel blade, process flour, sugar, cinnamon, ginger, cloves, salt, and baking soda until combined, about 10 seconds. Scatter butter pieces over flour mixture and process until mixture is sandy and resembles very fine meal, about 15 seconds. With machine running, gradually add molasses and milk; process until dough is evenly moistened and forms soft mass, about 10 seconds.

Alternatively, in bowl of standing mixer fitted with paddle attachment, stir together flour, sugar, cinnamon, ginger, cloves, salt, and baking soda at low speed until combined, about 30 seconds. Stop mixer and add butter pieces; mix at medium-low speed until mixture is sandy and resembles fine meal, about 1 1/2 minutes. Reduce speed to low and, with mixer running, gradually add molasses and milk; mix until dough is evenly moistened, about 20 seconds. Increase speed to medium and mix until thoroughly combined, about 10 seconds.

2. Scrape dough onto work surface; divide in half. Working with one portion of dough at a time, roll 1/4-inch thick between two large sheets of parchment paper. Leaving dough sandwiched between parchment layers, stack on cookie sheet and freeze until firm, 15 to 20 minutes. (Alternatively, refrigerate dough 2 hours or overnight.)

3. Adjust oven racks to upper- and lower-middle positions and heat oven to 350 degrees. Line two cookie sheets with parchment paper.

4. Remove one dough sheet from freezer; place on work surface. Peel off top parchment sheet and gently lay it back in place. Flip dough over; peel off and discard second parchment layer. Cut dough into 5-inch gingerbread people or 3-inch gingerbread cookies, transferring shapes to parchment-lined cookie sheets with wide metal spatula, spacing them 3/4 inch apart; set scraps aside. Repeat with remaining dough until cookie sheets are full. Bake cookies until set in centers and dough barely retains imprint when touched very gently with fingertip, 8 to 11 minutes, rotating cookie sheets front to back and switching positions top to bottom halfway through baking time. Do not overbake. Cool cookies on sheets 2 minutes, then remove with wide metal spatula to wire rack; cool to room temperature. (I did not switch positions of the cookie sheets in my gas oven. I just put the sheets on the top rack since they’re are no heating elements on the top.)

5. Gather scraps; repeat rolling, cutting, and baking in steps 2 and 4. Repeat with remaining dough until all dough is used.

From Cook’s Illustrated

Tuesday, December 15, 2009

What the Experts Won’t Eat

microwave popcorn From Prevention Magazine

How healthy (or not) certain foods are for us, is a hotly debated topic among experts and consumers alike, and there are no easy answers. But when Prevention talked to the people at the forefront of food safety and asked them one simple question—“What foods do you avoid?”—they got some pretty interesting answers. And their answers are, well, food for thought:

1. Canned Tomatoes

The expert: Fredrick vom Saal, PhD, an endocrinologist at the University of Missouri who studies bisphenol-A

The problem: The resin linings of tin cans contain bisphenol-A, a synthetic estrogen that has been linked to ailments ranging from reproductive problems to heart disease, diabetes, and obesity. Unfortunately, acidity (a prominent characteristic of tomatoes) causes BPA to leach into your food. Studies show that the BPA in most people's body exceeds the amount that suppresses sperm production or causes chromosomal damage to the eggs of animals. "You can get 50 mcg of BPA per liter out of a tomato can, and that's a level that is going to impact people, particularly the young," says vom Saal. "I won't go near canned tomatoes."

The solution: Choose tomatoes in glass bottles (which do not need resin linings), such as the brands Bionaturae and Coluccio. You can also get several types in Tetra Pak boxes, like Trader Joe's and Pomi.

2. Corn-Fed Beef

The expert: Joel Salatin, co-owner of Polyface Farms and author of half a dozen books on sustainable farming

The problem: Cattle evolved to eat grass, not grains. But farmers today feed their animals corn and soybeans, which fatten up the animals faster for slaughter. More money for cattle farmers (and lower prices at the grocery store) means a lot less nutrition for us. A recent comprehensive study conducted by the USDA and researchers from Clemson University found that compared with corn-fed beef, grass-fed beef is higher in beta-carotene, vitamin E, omega-3s, conjugated linoleic acid (CLA), calcium, magnesium, and potassium; lower in inflammatory omega-6s; and lower in saturated fats that have been linked to heart disease. "We need to respect the fact that cows are herbivores, and that does not mean feeding them corn and chicken manure," says Salatin.

The solution: Buy grass-fed beef, which can be found at specialty grocers, farmers' markets, and nationally at Whole Foods. It's usually labeled because it demands a premium, but if you don't see it, ask your butcher.

3. Microwave Popcorn

The expert: Olga Naidenko, PhD, a senior scientist for the Environmental Working Group,

The problem: Chemicals, including perfluorooctanoic acid (PFOA), in the lining of the bag, are part of a class of compounds that may be linked to infertility in humans, according to a recent study from UCLA. In animal testing, the chemicals cause liver, testicular, and pancreatic cancer. Studies show that microwaving causes the chemicals to vaporize—and migrate into your popcorn. "They stay in your body for years and accumulate there," says Naidenko, which is why researchers worry that levels in humans could approach the amounts causing cancers in laboratory animals. DuPont and other manufacturers have promised to phase out PFOA by 2015 under a voluntary EPA plan, but millions of bags of popcorn will be sold between now and then.

The solution: Pop natural kernels the old-fashioned way: in a skillet. For flavorings, you can add real butter or dried seasonings, such as dillweed, vegetable flakes, or soup mix.

4. Nonorganic Potatoes

The expert: Jeffrey Moyer, chair of the National Organic Standards Board

The problem: Root vegetables absorb herbicides, pesticides, and fungicides that wind up in soil. In the case of potatoes—the nation's most popular vegetable—they're treated with fungicides during the growing season, then sprayed with herbicides to kill off the fibrous vines before harvesting. After they're dug up, the potatoes are treated yet again to prevent them from sprouting. "Try this experiment: Buy a conventional potato in a store, and try to get it to sprout. It won't," says Moyer, who is also farm director of the Rodale Institute (also owned by Rodale Inc., the publisher of Prevention). "I've talked with potato growers who say point-blank they would never eat the potatoes they sell. They have separate plots where they grow potatoes for themselves without all the chemicals."

The solution: Buy organic potatoes. Washing isn't good enough if you're trying to remove chemicals that have been absorbed into the flesh.

5. Farmed Salmon

The expert: David Carpenter, MD, director of the Institute for Health and the Environment at the University at Albany and publisher of a major study in the journal Science on contamination in fish.

The problem: Nature didn't intend for salmon to be crammed into pens and fed soy, poultry litter, and hydrolyzed chicken feathers. As a result, farmed salmon is lower in vitamin D and higher in contaminants, including carcinogens, PCBs, brominated flame retardants, and pesticides such as dioxin and DDT. According to Carpenter, the most contaminated fish come from Northern Europe, which can be found on American menus. "You can only safely eat one of these salmon dinners every 5 months without increasing your risk of cancer," says Carpenter, whose 2004 fish contamination study got broad media attention. "It's that bad." Preliminary science has also linked DDT to diabetes and obesity, but some nutritionists believe the benefits of omega-3s outweigh the risks. There is also concern about the high level of antibiotics and pesticides used to treat these fish. When you eat farmed salmon, you get dosed with the same drugs and chemicals.

The solution: Switch to wild-caught Alaska salmon. If the package says fresh Atlantic, it's farmed. There are no commercial fisheries left for wild Atlantic salmon.

6. Milk Produced with Artificial Hormones

The expert: Rick North, project director of the Campaign for Safe Food at the Oregon Physicians for Social Responsibility and former CEO of the Oregon division of the American Cancer Society

The problem: Milk producers treat their dairy cattle with recombinant bovine growth hormone (rBGH or rBST, as it is also known) to boost milk production. But rBGH also increases udder infections and even pus in the milk. It also leads to higher levels of a hormone called insulin-like growth factor in milk. In people, high levels of IGF-1 may contribute to breast, prostate, and colon cancers. "When the government approved rBGH, it was thought that IGF-1 from milk would be broken down in the human digestive tract," says North. As it turns out, the casein in milk protects most of it, according to several independent studies. "There's not 100% proof that this is increasing cancer in humans," admits North. "However, it's banned in most industrialized countries."

The solution: Check labels for rBGH-free, rBST-free, produced without artificial hormones, or organic milk. These phrases indicate rBGH-free products.

7. Conventional Apples

The expert: Mark Kastel, former executive for agribusiness and codirector of the Cornucopia Institute, a farm-policy research group that supports organic foods

The problem: If fall fruits held a "most doused in pesticides contest," apples would win. Why? They are individually grafted (descended from a single tree) so that each variety maintains its distinctive flavor. As such, apples don't develop resistance to pests and are sprayed frequently. The industry maintains that these residues are not harmful. But Kastel counters that it's just common sense to minimize exposure by avoiding the most doused produce, like apples. "Farm workers have higher rates of many cancers," he says. And increasing numbers of studies are starting to link a higher body burden of pesticides (from all sources) with Parkinson's disease.

The solution: Buy organic apples. If you can't afford organic, be sure to wash and peel them first.

Monday, December 14, 2009

Zesty Oven Steak Fries

Zesty Oven Steak FriesSteak fries are more satisfying than regular fries. But all store bought or restaurant variations have a more pillowey texture than what I have normally made at home. So I decided to take another stab at it.

Zesty Oven Steak FriesRather than just relying on the oven to bake these potato wedges of differing sizes, I went to the microwave. I poked holes with the tines of a fork into whole potatoes and microwaved about 8 or 9 of them for 5-6 minutes. Once done, and slightly cooled, I cut the potatoes into wedges. The microwaving seemed to help the potatoes with their final texture. Once the wedges were baked in the oven, they came out crispy on the outside, and more like a baked potato on the inside.

I also like this particular set of spices to turn these potato wedges into something zesty. I originally used 2 teaspoons of salt, but quickly discovered it was too much. I’ve dropped it to 1 teaspoon.

Printable Version
  • 8 medium russet potatoes
  • 1/2 c. grated parmesan
  • 1 tsp. salt
  • 2 tsp. garlic powder
  • 2 tsp. paprika
  • 2 tsp. black pepper
  • Olive oil for drizzling over potatoes
  1. Heat oven to 450-degrees
  2. Spray a cooking sheet with cooking spray
  3. Combine all dry ingredients in a large bowl.
  4. Rinse potatoes and pierce the skin with a fork. Arrange on a microwave safe plate and heat in microwave for 5-6 minutes. (You still want the potato to be firm.)
  5. Remove from microwave, and cut potatoes into steak fry sized wedges.
  6. In a large bowl, drizzle the potatoes with the olive oil and mix with you hands until evenly coated.
  7. Add potatoes to your bowl of dry ingredients and coat well.
  8. Arrange potatoes on a single layer on baking sheet and bake for 30-35 minutes or until golden brown.


Friday, December 11, 2009

Slow Cooker Root Beer Pulled Pork

Pulled Pork Sandwich I picked up a Crock Pot Slow Cooker on Black Friday. So I was eager to put it to good use. So while searching for slow cooker recipes, I found one for pulled pork that really stood out.

You know how two ingredients should never go together in a recipe, such as a Krispy Kreme doughnut and a hamburger. Well surprisingly, root beer and pork loin goes together quite well.

Yea it sounds weird. But it turned out great. I just put the pork loin in the Crockpot, sprinkled with some salt and pepper, added the onions and garlic and set it for 8 hours. Once it was done, I could still smell the root beer and it gave it a unique flavor, but not overpowering at all. I imagine you could also use regular beer.

Be sure to drain the meat well before adding your barbecue sauce. I missed that step, and ended up putting the meat through a strainer to get rid of all the extra juices.

Printable Version
Ingredients
  • 1 (2 pound) pork tenderloin or pork shoulder
  • Salt and pepper
  • 1 (12 fluid ounce) can or bottle root beer
  • 1 medium onion, sliced into half rings.
  • 2 garlic cloves, cut in half
  • 1 (18 ounce) bottle your favorite barbecue sauce
  • 8 hamburger buns, split and lightly toasted
Directions
  1. Place the pork tenderloin in a slow cooker; pour the root beer over the meat. Cover and cook on low until well cooked and the pork shreds easily, 6 to 7 hours.
  2. Drain well.
  3. Stir in barbecue sauce.
  4. Serve over hamburger buns.

Note: the actual length of time may vary according to individual slow cooker.

Thursday, December 10, 2009

White Chocolate Fudge with Pecans

White Chocolate Fudge with PecansI love white chocolate and it’s also approaching the holidays. So I wondered if it’s possible to make white chocolate fudge. Sure enough there’s plenty of recipes out there. I opted to try one that was simple and had the least amount of ingredients.

I’ve melted white chocolate chips before and they always seemed to have a higher melting point as compared to regular chocolate chips. Of course, I could be wrong since they seemed to melt just fine in the sweetened condensed milk.

White Chocolate Fudge with PecansI also wondered how in the world would this fudge set up, when it’s just white chocolate chips and sweetened condensed milk. Well, I don’t know how it works but it sets up great. Just chill the finished fudge for two hours, cut into squares and then it’s good at room temperature.

The best way to describe this fudge is creamy, but has a texture more like fondant (used to decorate cakes). But don’t let that scare you. It’s an incredible change to the holiday platters of chocolate fudge.

Printable Version
Ingredients
  • 3 cups white chocolate chips (1 12-ounce bag plus half of another)
  • 1 (14 ounce) can sweetened condensed milk 
  • 1 teaspoon pure vanilla extract
  • 1 c. pecans
Directions
  1. Pour the chips, condensed milk and vanilla into a medium saucepan. Put the pan on the stove and turn the heat to low. (Stir occasionally while you prepare pan).

  2. Line an an 8-inch pan with foil. This makes it easier to remove the fudge when it’s time to cut.

  3. Stir the chips and milk until they melt together, about 3 minutes. Stir in pecans. Pour the fudge into the pan.

  4. Put the fudge in the refrigerator and chill until firm (about two hours, you can speed it up with the freezer). Lift the fudge from the pan and remove the foil. On a flat surface, cut the fudge into small squares to serve.

Variations:

Feeling festive? Use 1 1/2 cups shelled pistachios and 1/2 cup dried, sweetened cranberries instead of the pecans.

Adapted from Rachael Ray

Wednesday, December 2, 2009

Ultimate Southern Macaroni & Cheese

Southern Macaroni and CheeseSouthern Macaroni and CheeseThis past Thanksgiving I was treated to some comforting, homemade macaroni & cheese, so I had to share the recipe. Now many of us have come to the conclusion that mac and cheese should be swimming in sauce. We can thank box dinners for that idea. But real macaroni and cheese is so much heartier.

Homemade Macaroni and CheeseI’ve eaten homemade macaroni and cheese before. But each recipe was hit and miss. Often times the whole dish was heavy or the cheese just turned it into a greasy mess. But not this recipe.

Southern Macaroni and CheeseIt has a great cheesy flavor, but even more significant, the pasta came out fluffy instead of weighed down. This is the recipe I’ll stick with from now on.  

Printable Version
Ingredients
  • 1 lb elbow macaroni, cooked - al dente, drained well
  • 2 overflowing cups of sharp cheddar cheese, shredded or cut into 1/4-in cubes
  • 1 can evaporated milk
  • 1 Tbsp sugar
  • 2 eggs, beaten
  • Season salt - to taste
  • Fresh cracked black pepper - to taste
  • Dash or two or three or four of cayenne pepper


Directions
  1. In a bowl, mix cooked and well drained macaroni and cheese together.
  2. In another bowl whisk together eggs, milk, sugar and seasoning.
  3. Pour egg/milk mixture over mac and cheese mixture, stir until well incorporated.
  4. Pour into baking dish or tin, cover with foil.
  5. Bake at 350 degrees for about an hour.
  6. Remove foil, turn on broiler - broil top of mac and cheese until golden brown and bubbly.

Tuesday, December 1, 2009

Turkey Talk....


I think a lot of people are intimidated be the turkey especially when it comes to cooking that perfect turkey that the in-laws will be critiquing from here to eternity. Truth be told cooking the perfect turkey isn't really as tough as it looks. I use the brining method to ensure moist meat and brush the turkey with bacon fat and herbs to get that crispy skin and that amazing golden brown color. The brining is simple all it is really is a mixture of water, salt and sugar if you desire sugar. The turkey sits in the solution breast side down for 24 hours and then is removed rinsed and seasoned. I then render a few pieces of bacon and reserve the fat. I mix it with my desired seasoning and fresh chopped herbs and brush the entire turkey. I base the turkey throughout the cooking process and that it! Here's how mine turned out!

Mac -N- Cheese Anyone?


I have tried and tested dozens of recipes for baked macaroni and cheese and I have come across some very good ones, however I wanted to come up with one that give you the most bang for the buck meaning lots of cheese and the perfectly cooked pasta and a awesome mouth feel all around. I think I came up with one that just may fit the bill, I cooked this one for thanksgiving as part of a delightful feast. I say give it a try and if you want to tweek it a bit feel free!

Ingredients
1 lb elbow macaroni, cooked - al dente, drained well
2 overflowing cups of sharp cheddar cheese and colby cheese mix, shredded or cut into 1/4-in cubes
1/2 can evaporated milk
1/2 cup heavy cream
1 Tbsp sugar
2 eggs, beaten
Season salt - to taste
Fresh cracked black pepper - to taste
Dash or two or three or four of cayenne pepper


Directions
In a bowl, mix cooked and well drained macaroni and cheese together.
In another bowl whisk together eggs, milk,cream, sugar and seasoning.
Pour egg/milk mixture over mac and cheese mixture, stir until well incorporated.
Pour into baking dish or tin, cover with foil.
Bake at 350 degrees for about an hour.
Remove foil, turn on broiler - broil top of mac and cheese until golden brown and bubbly

Monday, November 30, 2009

Thanksgiving-the fallout

Thanksgiving TurkeyI hope everyone had a great Thanksgiving. Of course the fallout after this huge meal is the guilt. After all, we’re eating upwards of 3,000 calories. Luckily Lean Cuisines are on sale at the grocery store. Maybe I can eat those at least until Christmas. :-)

Thanksgiving MealThanksgiving is centered around the food. But this year I didn’t even have to cook. It’s good to know a chef. He put together this great meal for us.

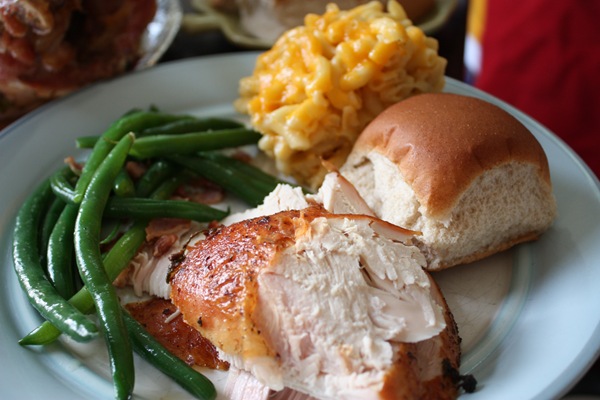
Homemade Macaroni and CheeseA wonderfully brined and moist turkey with macaroni and cheese, green beans and bacon and dinner rolls (store bought). We also had the choice of three deserts; chocolate cake, peach pie with a crumb topping, and sweet potato pie. I loved the sweet potato pie because it had a non-gummy texture and wasn’t overly spiced so the sweet potato flavor came through.

ZoieZoie's Thanksgiving BowlEven Zoie, my smart little border collie mix, got a Thanksgiving plate. You can see her extremely worried face as if she wasn’t going to get anything. But she got all the fixings and she even ate the green beans. It probably helped they were cooked in bacon.

Green Beans and Bacon

So I hope everyone had a great Thanksgiving. Now I need to prepare for Christmas, and that means cookies. I’m sure I’ll be testing a few recipes that you’ll see here soon. Wish me luck!

Friday, November 27, 2009

Easy Peanut Butter Fudge

Peanut Butter FudgeI hope everyone had a great Thanksgiving. I wrote this post on Thanksgiving, and set it up to post automatically. I have a feeling I’ll be up extra early to catch some of the Black Friday deals along with herds of crazed shoppers. I’m not proud of it, but hey, I need a griddle and a slow cooker for $13.00.

Peanut Butter FudgeBut if you’re not going shopping you may still have a house full of people to entertain and feed. So why not whip up an easy batch of peanut butter fudge and keep everyone’s sweet tooth in check.

Peanut Butter FudgeI’ve made fudge recipes before, that ended up crystallized and gritty with un-dissolved sugar. And granted, these sound like peanut butter flavored sugar cubes, but my batch came out creamy with a rich, peanut butter flavor.

Even if you don’t have time to make them for this holiday, they would be perfect for Christmas and New Years. Simple and tasty is the only way to go. 

Printable Version
Ingredients
  • 1/2 cup butter
  • 2 1/4 cups brown sugar
  • 1/2 cup milk
  • 3/4 cup peanut butter
  • 1 teaspoon vanilla extract
  • 3 1/2 cups confectioners' sugar
Directions
  1. Place butter into a medium saucepan and melt it over medium heat.

  2. Add brown sugar and milk, stirring.

  3. Boil for 2 minutes, stirring frequently.

  4. Remove from heat.

  5. Mix in peanut butter and vanilla.

  6. Place confectioners' sugar into a large mixing bowl.

  7. Pour hot peanut butter mixture over confectioners’ sugar and beat until smooth.

  8. Pour fudge into an 8 by 8 inch pan.

  9. Chill until firm, about 1 hour.

  10. Cut into 1-inch squares.


Wednesday, November 25, 2009

Baked Honey Mustard Chicken

Honey Mustard ChickenI don’t want to eat fast food everyday. So quick meals are what get me through the work week. And this recipe for chicken breasts is one of my new favorites. It seems the grocery stores here always have boneless skinless chicken breasts on sale, so I always stock up. But at this rate, I just may grow feathers.

Honey Mustard ChickenAnyhow, the flavors combine perfectly in this baked chicken dish. You won’t get too much honey or too much mustard flavor, as the two meld together to create a zingy and moist chicken breast. Serve alongside some wild rice.

Honey Mustard Chicken
Printable Version
Ingredients
  • 2 lbs boneless skinless chicken breasts

  • 1/3 cup honey

  • 1/4 cup Dijon mustard

  • 1 tablespoon lemon juice

  • 3 tablespoons butter

  • 1/8 teaspoon salt

  • 1/4 teaspoon crushed rosemary

Directions
  1. Preheat oven to 350°.

  2. Arrange chicken pieces in a shallow baking dish.

  3. In a saucepan over med-low heat, combine remaining ingredients. Heat and stir until melted and well-blended.

  4. Pour over chicken pieces.

  5. Bake at 350° for about 45-50 minutes (or until internal temperature of about 177-degrees); basting chicken occasionally.

  6. For the last 20 minutes of cooking, sprinkle with some Italian breadcrumbs.

Sunday, November 22, 2009

Oh No! Where’s My Eggo?

Kellogg is rationing its Eggo products due to flooding and equipment problems at two bakeries. The shortfall could last through mid-2010.

Flooding at an Atlanta bakery during heavy rains in October forced Kellogg to shut down production temporarily. Plus, equipment at Kellogg's largest waffle facility, based in Rossville, Tenn., needs extensive repairs.

Apparently remaining inventory will be rationed to stores across the country based on historical percentage of business.

You could always make waffles from scratch or with homemade Bisquick. It’s almost as fast as the toaster, and probably tastes better too.


Friday, November 20, 2009

Brown Sugar Apple Cheesecake

Apple CheesecakeI love cheesecake. But apple cheesecake is not my favorite. With that said, I was up for the challenge to come up with a recipe that worked for me. Let's just say my first venture into the land of apple cheesecake was a complete disaster. I used Granny Smiths and sautéed them much like this recipe calls for. But the apples were still too moist, allowing their juices to mix into the cheesecake batter making for a gloppy mess. This time was different thankfully.

Apple CheesecakeI adapted my base cheesecake recipe with some added brown sugar, apple pie spice (usually a mixture of cinnamon, nutmeg and allspice) an d apple cider. The apple cider gave it a hint of apple flavor but the star of the cheesecake are the apples themselves. A surprise layer of sweet and caramelized apples are hidden inside this cheesecake. They came out tender and didn’t mess with the texture of the cheesecake batter.

Apple CheesecakeI used Fuji apples this time and I was pleasantly surprised. They don’t fall apart in the frying pan, they hold their texture and even caramelize beautifully with a little added brown sugar. These are my new favorite cooking apples.

Apple CheesecakeThe ginger snap crust was great with some added cinnamon and brown sugar. Although the cookies are strong flavored, the crust didn’t overpower all the other flavors.

Apple CheesecakeOverall, this cheesecake is a winner. But now I want to try the recipe with the apples ON TOP of the cheesecake, drizzled with some caramel sauce. That sounds even better.

Printable Version
Filling

4 (8 ounce) packages cream cheese

1 c. brown sugar

½ c. white sugar

¾ c. milk

4 Tbs. apple cider

4 eggs

1 c. sour cream

¼ c. all-purpose flour

1 ½ teaspoons apple pie spice

Apples

4 tablespoons butter, divided

3 large Fuji, peeled, cored and cut thinly, divided

2 tablespoons brown sugar, divided

Crust

1 ½ c. ginger snap cookie crumbs

2 Tbs. brown sugar

4 Tbs. melted butter

½ tsp. cinnamon


Directions

For the Apples

In a large skillet, melt 2 tablespoons butter over medium-high. Stir in half of the apples and cook, until they are golden and limp, about 5 to 10 minutes. Scatter the apples with 1 tablespoon brown sugar and cook, tossing to coat, for 1 minute. Scrape apple mixture onto a plate and repeat with remaining apples, butter and sugar. When done, set aside to cool.

For the Crust

In a medium bowl, stir together cookie crumbs, brown sugar, and cinnamon. Drizzle in butter and stir to moisten the crumbs. Scoop crumbs into a spring form pan coated with nonstick spray and firmly press them over the bottom and up the sides of the pan. Place pan into a preheated oven at 350 degrees and cook for 10 minutes, until the edges are golden. Remove from oven and allow to cool.

For the Filling
  1. Triple wrap bottom of spring form pan with the wide version of Reynolds foil.
  2. In a large bowl or stand mixer, mix cream cheese with sugars until smooth. Blend in milk and apple cider, and then mix in eggs one at a time, mixing just enough to incorporate. Mix in sour cream, apple pie spice and flour until smooth.
  3. Pour about a third of the filling into the prepared crust. Add the apples as an even layer, and pour the rest of the filling on top.
  4. Use a water bath for the cheesecake. Put spring form pan in larger rectangular pan. Set in oven, and add water until about 1-2 inches high on spring form pan.
  5. Bake in preheated oven for 1 hour. Turn the oven off and leave cheesecake to cool, about 2-3 hours, to prevent cracking from cooling down too fast. Then remove from oven and set on counter to finish cooling to room temperature.


Monday, November 16, 2009

Oat-Nut Pancakes

Oat Nut PancakesTired of plain ol’ pancakes? It seems many restaurants have a fascination with thick, heavy pancakes. They’re so thick, they barely get a chance to cook inside, leaving a funny, floury after-taste. They may even go so far as to call them “fluffy.” But as you near the end of your breakfast, you realize you’d rather not see another plate of pancakes any time soon.

There’s really not much to pancakes. It’s basically flour and water or milk. Not exactly the most nutritious by the time it’s drizzled with syrup and butter. But enough preaching. I wanted to try a different take on the regular pancakes. This recipe is said to be a copycat of Ihop’s Harvest Grain & Nut Pancakes. I’ve only eaten at Ihop once so I can’t say if these taste like them or not. But I will say this is a welcome change to Bisquick-style pancakes.

Oat Nut PancakesI ground up the oats and mixed all the ingredients together. Once my pan was hot enough I added the batter and waited for the first side to get done. It seemed to take a little longer for these to cook compared to regular pancakes. My pan was lopsided on the bottom so that may have had something to do with it. But I soon found they do indeed cook differently.

Flipping the pancakes was a more delicate process than I’m used to. I had to wait to flip them until the top batter was almost dry. Once I realized how they cook, the rest of the process was easy.  

Oat Nut PancakesAnd the small amount of extra effort paid off. They turned out pillowy, and I mean that in a good way. The syrup didn’t just run off the top, it soaked into every nook and cranny it could, almost like a sponge. The taste was hearty and wholesome from the wheat flour, the oats and walnuts. While the buttermilk helped give it a slight zing.

As for my crappy frying pan? It’s about to be traded in for a nice griddle. That’s the one thing I’ll be after during all these crazy Black Friday sales.

Printable Version
Ingredients
  • 3/4 cup Quaker Oats
  • 1/2 cup whole wheat flour
  • 1/4 cup all-purpose flour
  • 2 teaspoons baking soda
  • 1 teaspoon baking powder
  • 1/2 teaspoon salt
  • 1 1/2 cups buttermilk
  • 1/4 cup vegetable oil
  • 1 egg
  • 1/4 cup sugar
  • 3 tablespoons chopped walnuts
Directions
  1. Lightly oil a skillet or griddle, and preheat it to medium heat.

  2. Grind the oats in a blender or food processor until fine, like flour.

  3. Combine ground oats, whole wheat flour, baking soda, baking powder and salt in a medium bowl.

  4. In another bowl combine buttermilk, oil, egg and sugar with an electric mixer until smooth.

  5. Combine dry ingredients with wet ingredients, add nuts and mix well with mixer.

  6. Ladle 1/3 cup of the batter onto the hot skillet and cook the pancakes for 2 to 4 minutes per side or until brown.

Saturday, November 14, 2009

The Perfect Roasted Chicken - (in my humble opinion)

I love chicken, mostly because I ate it so much growing up but also because it is so versatile. There are over a million recipes for chicken I'm sure and I'm sure just about as many ways to cook the bird, but the trick is to use the proper technique for each recipe you try. I've roasted countless chicken throughout my time as a cook and I am constantly looking for ways to improve recipes and simplify the process of roasting in general but I have found the classic technique to be the best. This is a dinner I cooked a few nights ago for someone and here's that recipe, try it for yourself and see if it works as well for you!

1 3-4 lb. (approximately) chicken, quartered
1/4 cup flour
1/2 tsp. salt
1/8 tsp. pepper
1/4 tsp. thyme
1/4 tsp. oregano or marjoram
1/4 tsp. rosemary
2 tsp. fresh parsley, minced
3 cloves garlic
1 large onion, chopped
1/2 cup chicken broth

Preheat oven to 375°F.
Wash chicken and cut into quarters.

In a heavy skillet, add olive oil to a depth of 1/4 inch. Add whole cloves garlic and chopped onion.

Measure flour, salt and pepper into a zipper plastic bag. Shake 2 pieces of chicken at a time in the bag until well coated.

Brown the chicken evenly on both sides in the olive oil. There is no need to cook through. Transfer browned chicken and onion slices to a casserole dish or baking pan.

Combine herbs and chicken broth. Baste chicken with broth and a little olive oil, and continue to baste occasionally during the cooking.

Roast chicken for 50 minutes or until tender and juices run clear (depends upon weight of chicken). Breast temperature should be about 160°F.